![]() Download BlazeHunter Series manual (.PDF, 2.5 Mb)
Download BlazeHunter Series manual (.PDF, 2.5 Mb)
Preparing the Device
Unpacking
The following steps must be performed before using the device:
- Open packaging box, remove BlazeHunter and check the contents.
- Thermal monocular camera
- Battery
- Battery Charger
- Camera Pouch
- Type-C Cable
- Manual
- Lens cloth
- Warranty card
- Make sure that nothing is missing.
- Inspect the device for damage to optical surfaces, body, eyecups, operation buttons, etc.
- Ensure that all optical surfaces are clean and ready for use.
NOTE:
If any accessories are missing or broken contact ATN’s Customer Service at 1.800.910.2862.
CHARGING THE DEVICE
The start bar will display battery information after the Camera starts. When the battery is low, charge the Camera timely to make sure the normal function.
- When charging the Camera, keep the battery temperature 0 °C to +60 C (+32 °F to +140 °F). Otherwise the charging function will be automatically disabled.
- Charge the Camera with the Type-C data cable that comes with the delivery. STEP 1. Open the sealing cover of the Type-C port when charging. STEP 2. Connect the Type-C cable to the Type-C port to charge the Camera.
The charging indicator states:
- Red light on: charging.
- Green light on: fully charged.
- Off: not connected to data cable to charge.
ON / OFF
Press and hold the power button to start or shut down the Camera; press the power button to suspend or weak up the Camera.
NOTE:
After starting the Camera, remove the protective cover of the lens.
When the Camera is off, press and hold the power button to start it. When the Camera is on, press and hold the power button to shut down it. When the Camera is on, press the power button to suspend the Camera. When the Camera is in suspend mode, press the power button to weak up it.
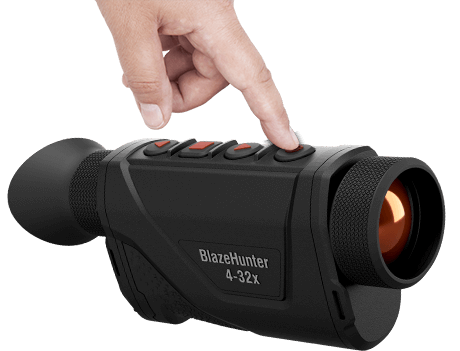
INTERFACE
MAIN OPERATIONS
OPERATION WITH KEYPAD
- POWER BUTTON
- Press and hold to start or shut down the Camera.
- Press to enable or disable the suspend mode.
- UP BUTTON
- Press and hold to record videos.
- Press to capture images. For devices with laser range finder:
- Press to enable the laser ranging mode.
- Press and hold to record videos.
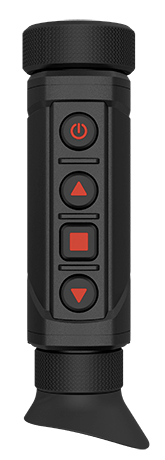
 - POWER BUTTON
 - UP BUTTON
 - MENU BUTTON
 - DOWN BUTTON
CAUTION:
Laser can cause damages to eyes. Do not look directly at the laser beam or observe the beam with optical devices when the laser is on.
NOTE:
Make sure that you have set the laser ranging mode before enabling the function. For detail, see “Setting Laser Ranging”.
The ranging function is only available when the distance is longer than 10 m.
- MENU BUTTON
- Press and hold to enter the main menu.
- Press to select the color palettes.
- DOWN BUTTON
- Press and hold to manually adjust the shutter.
- Press for digital zoom.
UP BUTTON + MENU BUTTON
Press the two buttons at the same time to capture images.
FUNCTIONS
CONFIGURING THE CAMERA
MENU DESCRIPTION
When the Camera is on, press and hold MENU BUTTON to enter the main menu. Functions of all buttons are as follows.
- Press UP BUTTON to move upward the cursor.
NOTE:
For the camera with laser range finder, press to move upward the cursor. In this section, we use UP BUTTON as an example.
- Press DOWN BUTTON to move downward the cursor.
- Press MENU BUTTON to confirm.
- Press and hold POWER BUTTON to exit.
DISPLAY
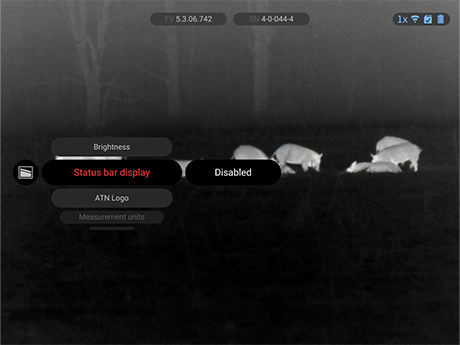
SETTING STATUS BAR DISPLAY
- On the main menu, press UP BUTTON or DOWN BUTTON to select OSD .
- Press MENU BUTTON to enable OSD to display the status bar.
SETTING SCREEN BRIGHTNESS
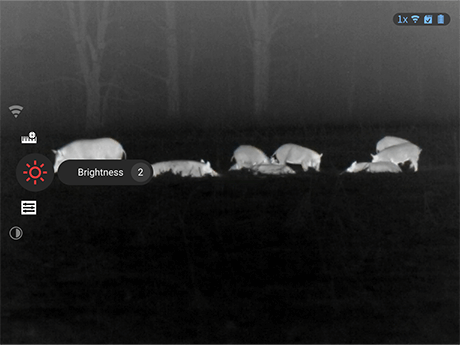
Adjusts the overall screen brightness. The higher the level is, the brighter the screen will be.
- On the main menu, press UP BUTTON or DOWN BUTTON to select Brightness.
- Press MENU BUTTON to select the brightness level. The higher the level is, the brighter the screen will be.
SETTING CONTRAST
You can set the contrast. The higher the level is, the more the contrast will be between bright and dark areas.
- On the main menu, press UP BUTTON or DOWN BUTTON to select Contrast.
- Press MENU BUTTON to select the contrast level.
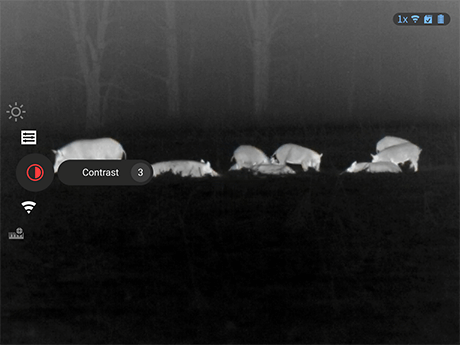
IMAGE ADJUSTMENT
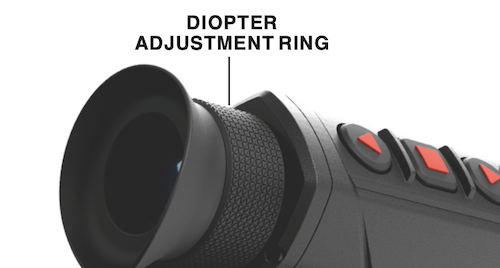
ADJUSTING DIOPTER
To get clear images, rotating the diopter adjustment knob to fit your eyesight.
NOTE:
For the first-time use, adjust the diopter before configuring the functions.
- Aim the lens at the target, and then make your eyes close to the eyeshade.
- Adjust clockwise or counterclockwise the knob according to your eyesight.
ADJUSTING FOCUS
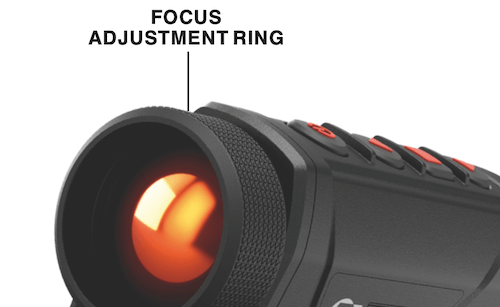
Rotate the focusing ring to get a clear view. This function is only available on the models with adjustable lens.
- Aim the thermal lens to the target.
- Adjust clockwise or counterclockwise the focusing ring until the view is clear.
NOTE:
During the adjustment, do not touch the lens to avoid smudging it; otherwise it may affect the image quality.
SETTING COLOR PALLETES
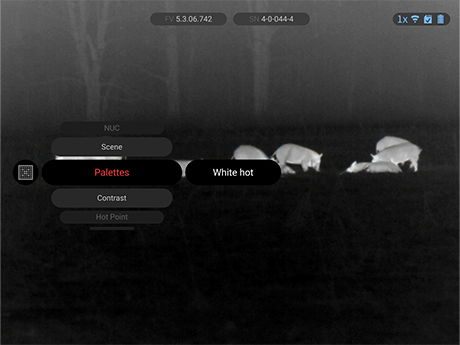
Select the color palettes, which adds color to the thermal image and uses color to indicate the temperature.
On the viewing screen, press MENU BUTTON to select the color palettes.
White Hot: The objects with high temperature are white. The higher the temperature, the brighter the color.
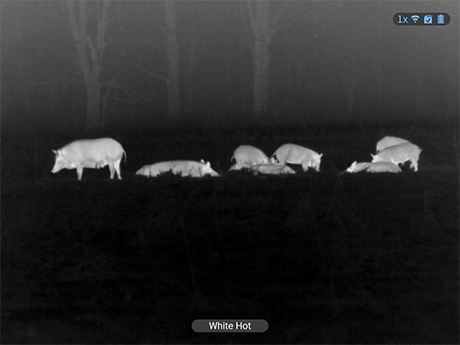
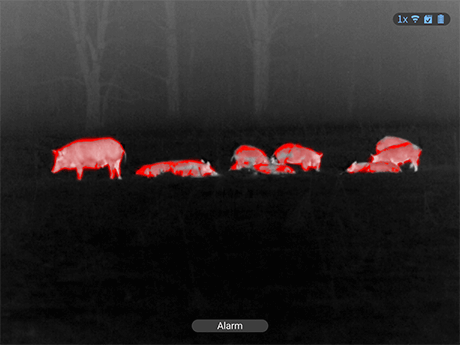
White Hot + Red: The objects with high temperature are red. The objects can stand out.
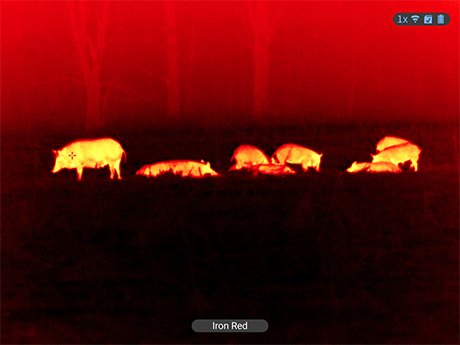
Iron Red: The objects with high temperature are red. The higher the temperature, the brighter the color.
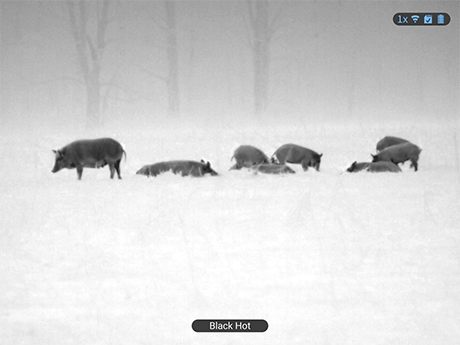
Black Hot: The objects with high temperature are black. The higher the temperature, the darker the color.
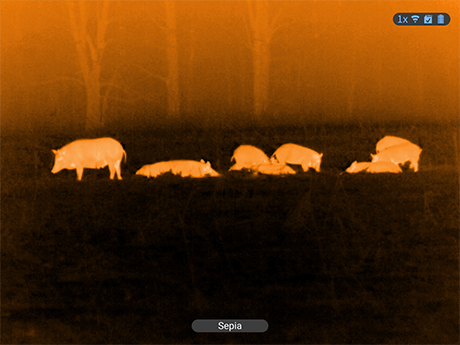
Sepia: The objects with high temperature are brown. The higher the temperature, the brighter the color.
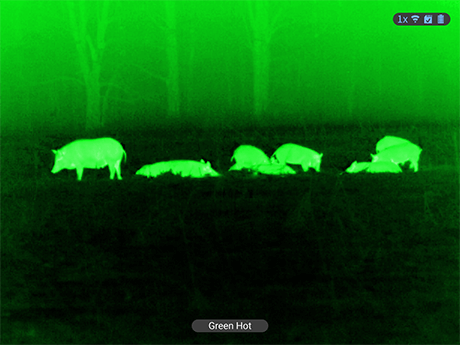
Green Hot: The objects with high temperature are green. The higher the temperature, the brighter the color.
SETTING DIGITAL ZOOM
Digital zoom helps to zoom in the image.
On the viewing screen, press DOWN BUTTON to do digital zoom, and the image changes.
SETTING IMAGE BRIGHTNESS
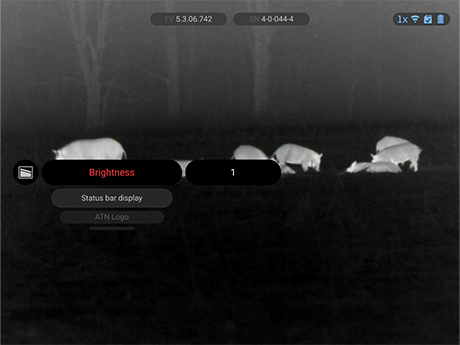
Adjusts the image brightness. The higher the level is, the brighter the image will be.
- On the main menu, press UP BUTTON or DOWN BUTTON to select Brightness.
- Press DOWN BUTTON to select the brightness level. The higher the level is, the brighter the image will be.
SETTING SHARPNESS
Adjusts the sharpness of picture edges. The higher the level is, the clearer the picture edges will be.
- On the main menu, press UP BUTTON or DOWN BUTTON to select.
- Press to select the sharpness level. The higher the level is, the clearer the picture edges will be.
VIDEO AND SNAPSHOT
RECORDING VIDEOS
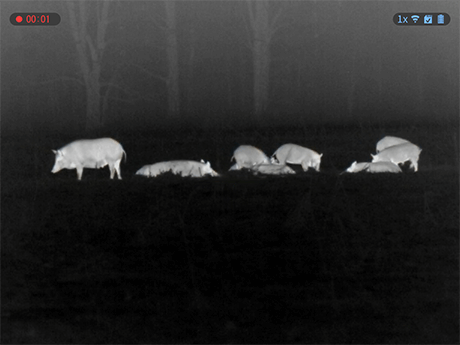
On the viewing interface, press UP BUTTON and hold for 3 seconds to start recording a video. The recording icon flashes on the screen and the recording time is display.
Press and hold UP BUTTON again for 3 seconds to stop the recording. When the recording stops, the recording time will display normally.
CAPTURING IMAGES
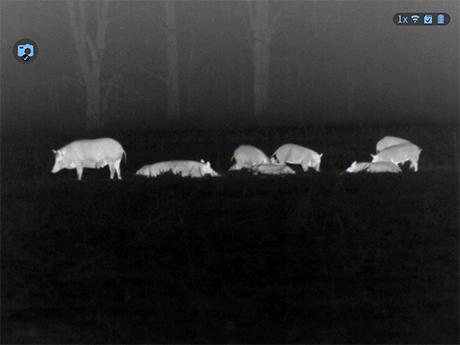
On the viewing page, press UP BUTTON to capture images.
The screen will display an icon when the capturing succeeds.
EXPORTING FILE
Exports the recorded and captured files.
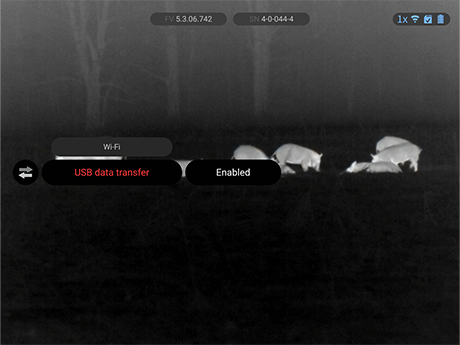
- Connect the Camera to the computer through a Type-C data cable.
The driver will automatically be installed for first-time connection.
NOTE:
Connect the cables before starting the Camera. Do not hot swap the Type-C port of the Camera.
Select Storage on the USB Mode configuration screen after connecting the Camera to the computer.
- On the computer desktop, double-click My Computer, and then open the Camera disk at a mobile storage device.
- Select the files to export and copy them to the computer.
The specific computer client is required for playing the exported files. - Disconnect the Type-C data cable with the computer.
After connecting the Camera to the computer, images can be displayed on the Camera, but the functions of recording and capturing will not be available.
AUTOMATIC SHUTDOWN
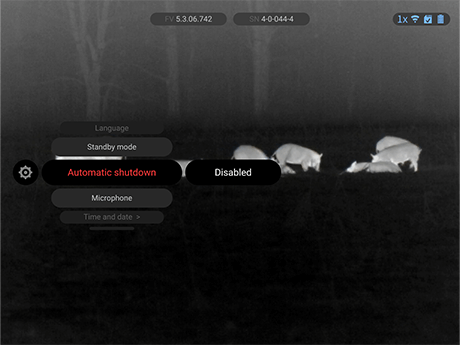
- Press and hold MENU BUTTON to go to the main menu.
- Press UP BUTTON or DOWN BUTTON to select settings.
- Press MENU BUTTON to go to the System Settings configuration screen.
- Press UP BUTTON or DOWN BUTTON to select Power.
- Press MENU BUTTON to set the auto shutdown time. If there is no operation in the configured time, the Camera will automatically shut down.
- Press and hold MENU BUTTON to save the configuration and exit.
After finishing the auto shutdown settings, the Camera will suspend first, and then shut down.
SETTINGS
SETTING HOT POINT
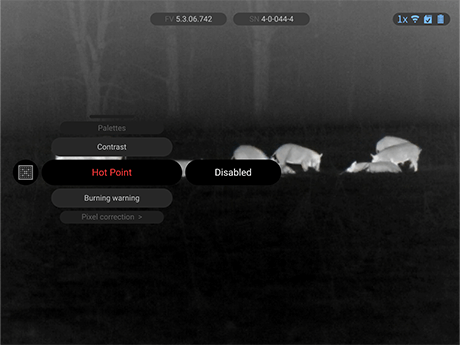
Tracks the point with the highest temperature in real time.
- On the main menu, press UP BUTTON or DOWN BUTTON to select Hot Point.
- Press MENU BUTTON to enable or disable Hot Point.
After enabling Hot Point, the hot point icons will automatically locate at the point with the highest temperature in the image.
SETTING FOREST MODE
- On the main menu, press UP BUTTON or DOWN BUTTON to select Forest Mode.
- Press MENU BUTTON to enable or disable Forest Mode. Forest mode stands out the targets with high temperature, which makes it easier to find out the targets.
SETTING RANGING MODE
After setting the ranging mode, the Camera can measure the range towards targets.
This function is only available on the models without laser range finders. For models with laser range finders, see “Setting Laser Ranging”.
NOTE:
To guarantee the measurement accuracy, keep your hand steady when measuring the range.
- On the main menu, press UP BUTTON or DOWN BUTTON to select Ranging Mode.
- Press MENU BUTTON to go to the Ranging Mode configuration screen.
- Press UP BUTTON or DOWN BUTTON to move the blue lines to the top and bottom of the target to get the distance between the target and the Camera.
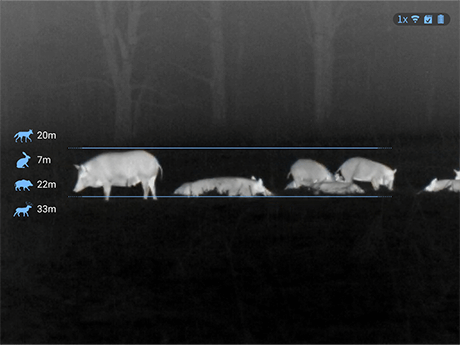
Use the following fig as an example:
- If the target is a jackal, it is 20 m away from Camera.
- If the target is a rabbit, it is 7 m away from Camera.
- If the target is a wild boar, it is 22 m away from Camera.
- If the target is a deer, it is 33 m away from Camera.
SETTING LASER RANGING
This function is only available on the models with laser range finders. For models without laser range finders, see “Setting Ranging Mode”.
CAUTION:
Laser can cause damages to eyes. Do not look directly at the laser beam or observe the beam with optical devices when the laser is on.
MEASUREMENT CONSIDERATIONS
- MEASUREMENT TARGETS The Camera is suitable for measuring the distance between the camera and the targets with high reflectivity (such as road signs on highways), the targets with moderate reflectivity (such as wall) and the targets with low reflectivity (such as tree, golf flag, utility pole, and animal). When the reflectance is reduced to a certain extent, the range will be reduced accordingly.
- FACTORS THAT INFLUENCE RANGING CAPABILITY
- Target reflectivity: Generally, the higher the reflectivity of the target, the better the ranging ability. For example, the measuring range of the Camera is 1,500 m for a target with moderate reflectivity, which can be up to 1,800 m for a target with high reflectivity, and 600 m for the targets with low reflectivity. (It might fail to measure the target that hardly generates diffuse reflection, such as water surface.)
- Target shape: When a target is too small or uneven, the ranging ability will decrease.
- Measuring angle: The measurement is more accurate when the reflection surface of target is vertical to the laser emission’s direction. If you use the Camera under some extreme conditions, the measurement might be inaccurate.
- Measuring environment: The environment factors include sunshine intensity, the concentration of water vapor in the air and suspended particles (such as rain, fog, snow, fog and haze).
- THE RANGE ABILITY OF THE CAMERA DEFINED UNDER THE FOLLOWING CONDITIONS:
- The measurement target is with moderate reflectivity, such as walls.
- The reflection surface of target is vertical to laser emission direction.
- The weather condition is sunny but not under the condition of direct sunlight.
- The reflection area is larger than 2 m x 2 m.
SETTING LASER RANGING MODE
After setting the laser ranging mode, the Camera can measure the range towards targets.
NOTE:
To guarantee the measurement accuracy, keep your hand steady when measuring the range.
- On the main menu, press UP BUTTON or DOWN BUTTON to select Ranging Mode.
- Press MENU BUTTON to select the laser ranging mode.
- Once: After pressing the laser button, the Camera measures the distance between the camera and the target once.
- Continue: After pressing the laser button, the Camera continuously measures the distance between the Camera and the target in 15 s.
SETTING WI-FI CONNECTION
To connect your ATN device to your smartphone or tablet, follow these steps:
ENABLE WIFI ON YOUR ATN DEVICE
- Long press the Menu button.
- Use the Up and Down buttons to navigate the menu.
- Select and enable the WiFi function.
INSTALL THE ATN APP
Download the ATN Blaze app from the App Store or Google Play.
Open the app and follow these steps:
- Tap Connect New Device.
- Choose your device type and tap next.
NOTE:
When this is completed, choose the first option “Connect to Blaze Hunter”.
- Ensure your device’s WiFi is enabled.
- Tap Read SSID from QR Code and scan the QR code located on the back of the device lens cover.
- Enter the WiFi password (12345678) when prompted.
- Tap Next.
Once the app confirms “We found your Blaze Hunter,” your device is successfully connected. You can now control your device, access live streaming, and browse the gallery directly from your phone or tablet.
WIFI SPECIFICATIONS
- Frequency band: 2.4 GHz (2.4 GHz to 2.4835 GHz).
- Transmitted power limit: 20 dBm.
SETTING LANGUAGE
You can select the language as needed.
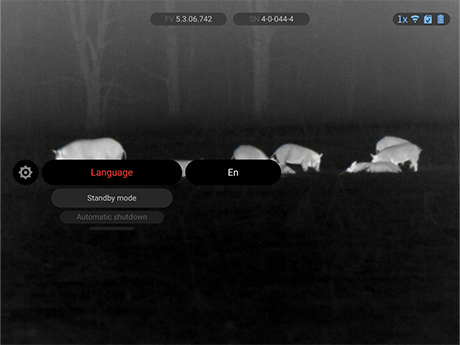
- On the main menu, press UP BUTTON or DOWN BUTTON to select Language.
- Press MENU BUTTON to go to the language selection screen.
- Press DOWN BUTTON to select the language as needed.
- Press MENU BUTTON to save and exit.
SETTING DPC
After enabling DPC (Defective Pixels Correction), you can correct the defective pixels in the image.
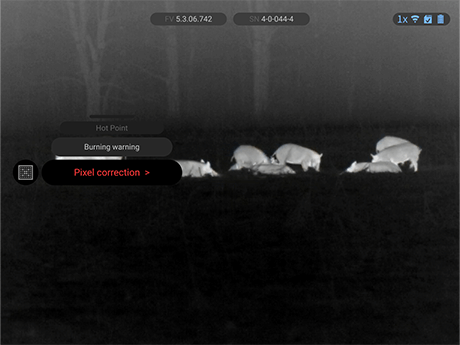
- On the main menu, press UP BUTTON or DOWN BUTTON to select DPC.
- Press MENU BUTTON to go to the Function Set configuration screen.
- Press UP BUTTON or DOWN BUTTON to select Settings.
- Press to go to the DPC configuration screen.
- Auto: The Camera automatically corrects the defective pixels in the image.
- Select Auto.
- Press MENU BUTTON to start the auto correction.
- Follow the screen instructions to close the lens cover.
- Press MENU BUTTON to save the configurations.
- Manual: You need to correct the defective pixels manually.
- Press MENU BUTTON to select X-axis and Y-axis.
- Press and hold UP BUTTON or DOWN BUTTON to calibrate the defective pixels.
- Press and hold MENU BUTTON to save the configuration.
NOTE:
The center of the cursor is the position of the defective pixel.
- Restore: The DPC configuration is restored to the primary state.
FUNCTION SETTINGS
- On the main menu, press UP BUTTON or DOWN BUTTON to select Function Settings.
- Press MENU BUTTON to go to the Function Set configuration screen.
- Press UP BUTTON or DOWN BUTTON to select the function to be configured.
Burning Warning:
Press to enable the burning warning function. When the lens is in the risk of burning, a note will be displayed on the screen and the shutter will be off automatically.
Logo:
Press to enable logo display, and the logo will be display when the camera is starting.
OSD:
Press to enable OSD display, and the status bar is displayed.
Auto FFC:
Press to enable FFC (Flat-Field Calibration) mode, and the camera calibrates image automatically at regular intervals.
DPC:
Press to enable DPC (Defective Pixels Correction), and you can correct the defective pixels in the image. For details, see “Setting DPC”.
SYSTEM SETTINGS
- On the main menu, press UP BUTTON or DOWN BUTTON to select Settings.
- Press MENU BUTTON to go to the System Set configuration screen.
- Press UP BUTTON or DOWN BUTTON to select the parameter to be configured.
Auto Standby:
Press to select the auto standby time. If there is no operation in the configured time, the Camera will automatically suspend.
Auto Shutdown:
Press to select the auto shutdown time. If there is no operation in the configured time, the Camera will automatically shut down.
USB Mode:
Press to select the USB mode.
- Storage: The Camera can be used as a storage device.
- Off: Charge the Camera.
Unit Set:
Press to select the unit from Yd and Metre.
Time Display:
Press to select the display format of the time.
Time Set
Press to select the date or time to be configured; press or to set the value.
Version:
View the device information such as serial number and version number.
Restore Default:
Restore the device to default configuration.
NOTE:
This operation will restore the camera to default configuration. Please be careful.
WARNINGS AND CAUTIONS
- Prevent liquid from flowing into the Camera to avoid damage to the internal components.
- Do not stuff foreign materials into the Camera to prevent a short circuit which could result in the Camera being damaged or people becoming injured.
- Do not expose the device to high electromagnetic radiation or dusty environments.
- Do not aim the lens at the sun or any other bright light.
- Improper use or replacement of the battery may result in explosion hazard.
- Do not charge other battery types with the supplied charger. Confirm there is no flammable material within 2 m of the charger during charging.
- Make sure that the plug is properly connected to the power socket.
- Do not connect multiple devices to one power adapter, to avoid over-heating or fire hazards caused by overload.
- If smoke, odor, or noise arises from the device, immediately turn off the power, unplug the power cable, and contact the service center.
- Do not dismantle the Camera. The internal components can only be repaired by a qualified professional. Dismantling it without professional assistance might cause water seeping in or might result in the Camera producing poor quality images.
- Operating temperature: –30 °C to +55 °C (–22 °F to +131 °F), and the operating humidity shall be 95% or less.
- Prevent liquid from flowing into the Camera to avoid damage to the internal components. In case the liquid enters the Camera, immediately stop using the Camera, cut off the power, and disconnect all the cables, and then contact your local customer service center.
- Use the accessories regulated by the manufacturer. The Camera should be maintained by qualified professionals.
- Make sure to cut off the power before cleaning the Camera, to prevent electric shock.
- Clean the Camera body with a piece of soft dry cloth. For any dirt that is hard to remove, pick up a piece of clean and soft cloth, dip it into a little neutral detergent and gently wipe the dust away.
- After that, wipe away all the remaining liquid on the Camera with another dry cloth. Never use volatile solvents such as alcohol, benzene and thinner, or cleaners that are strong and abrasive.
- Otherwise, the Camera’s surface coating will be damaged and its working performance will be encumbered.
CAUTION:
Failure to follow these safety instructions could result in damage to the device!
3 YEAR PRODUCT WARRANTY
This product is guaranteed to be free from manufacturing defects in material and workmanship under normal use for a period of 3 (three) years from the date of purchase. In the event a defect that is covered by the foregoing warranty occurs during the applicable period stated above, ATN, at its option, will either repair or replace the product, and such action on the part of ATN shall be the full extent of ATN’s liability, and the Customer’s sole and exclusive remedy. This warranty does not cover a product (a) used in other than its normal and customary manner; (b) subjected to misuse; (c) subjected to alterations, modifications or repairs by the Customer or by any party other than ATN without prior written consent of ATN; (d) special order or “close-out” merchandise or merchandise sold “as-is” by either ATN or the ATN dealer; or (e) merchandise that has been discontinued by the manufacturer and either parts or replacement units are not available due to reasons beyond the control of ATN. ATN shall not be responsible for any defects or damage that in ATN’s opinion is a result from the mishandling, abuse, misuse, improper storage or improper operation, including use in conjunction with equipment which is electrically or mechanically incompatible with or of inferior quality to the product, as well as failure to maintain the environmental conditions specified by the manufacturer. This warranty is extended only to the original purchaser. Any breach of this warranty shall be waived unless the customer notifies ATN at the address noted below within the applicable warranty period.
The customer understands and agrees that except for the foregoing warranty, no other warranties written or oral, statutory, expressed or implied, including any implied warranty of merchantability or fitness for a particular purpose, shall apply to the product. All such implied warranties are hereby and expressly disclaimed.
LIMITATION OF LIABILITY
ATN will not be liable for any claims, actions, suits, proceedings, costs, expenses, damages or liabilities arising out of the use of this product. Operation and use of the product are the sole responsibility of the Customer. ATN’s sole undertaking is limited to providing the products and services outlined herein in accordance with the terms and conditions of this Agreement. The provision of products sold and services performed by ATN to the Customer shall not be interpreted, construed, or regarded, either expressly or implied, as being for the benefit of or creating any obligation toward any third party of legal entity outside ATN and the Customer; ATN’s obligations under this Agreement extend solely to the Customer. ATN’s liability hereunder for damages, regardless of the form or action, shall not exceed the fees or other charges paid to ATN by the customer or customer’s dealer. ATN shall not, in any event, be liable for special, indirect, incidental, or consequential damages, including, but not limited to, lost income, lost revenue, or lost profit, whether such damages were foreseeable or not at the time of purchase, and whether or not such damages arise out of a breach of warranty, a breach of agreement, negligence, strict liability or any other theory of liability.
PRODUCT WARRANTY REGISTRATION
In order to validate the warranty on your product, ATN must receive a completed Product Warranty Registration Card for each unit or complete warranty registration on our website at www.atncorp.com. Please complete the included form and immediately mail it to our Service Center: ATN Corporation, 2400 NW 95 Ave, Doral, FL 33172.
OBTAINING WARRANTY SERVICE
To obtain warranty service on your unit, End user must notify ATN service department by calling 800-910-2862 or 650-989-5100 or via e-mail service@atncorp.com to receive a Return Merchandise Authorization number (RMA).
When returning please take or send the product, postage paid, with a copy of your sales receipt to our service center, ATN Corporation at the address noted above. All merchandise must be fully insured with the correct postage; ATN will not be responsible for improper postage or, missing or damaged merchandise during shipment.
When sending product back, please clearly mark the RMA# on the outside of the shipping box. Please include a letter that indicates your RMA#, Name, Return Address, reason for service return, Contact information such as valid telephone numbers and/or e-mail address and proof of purchases that will help us to establish the valid start date of the warranty. Product merchandise returns that do not have an RMA listed may be refused or a significant delay in processing may occur.
Estimated Warranty service time is 10-20 business days. End-user/customer is responsible for postage to ATN for warranty service. ATN will cover return postage/shipping to continental USA end-users/customers after warranty repair only if product is covered by aforementioned warranty. ATN will return product after warranty service by domestic UPS ground and/or domestic mail. Any other requested, required or international shipping method the postage/shipping fee will be the responsibility of the end-user/customer.
