![]() Download this manual (.PDF, 300 Kb)
Download this manual (.PDF, 300 Kb)
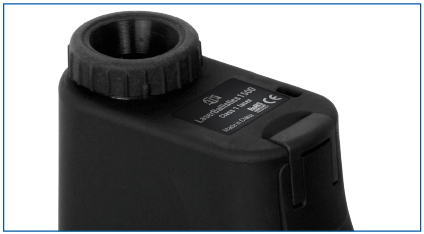
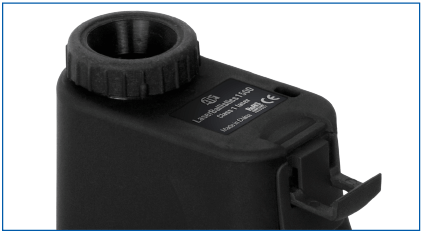
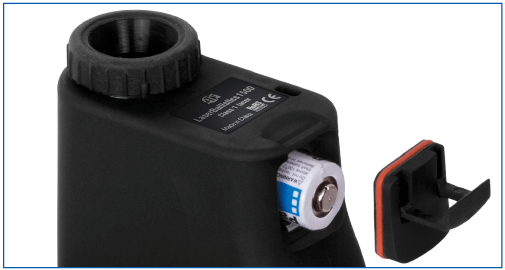
1. Battery installation
2. Startup screen
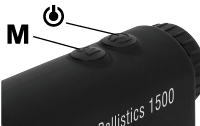
Press  key to Power Up the device.
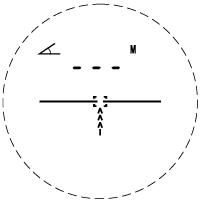
The first screen when you Power Up the device will appear. The image to the right, illustrates the Object Distance Measurement screen. The unit will turn off by itself after several minutes of inactivity.
3. Unit conversion
The device has two units of measure options, meters and yards.
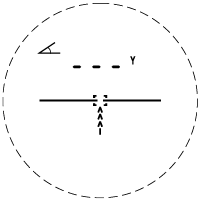
In order to switch between the two modes, press and hold the  button until the mode changes.
4. Low battery indicator
The device has a low battery indicator. When the battery falls below the required level of voltage, the battery indicator will appear.
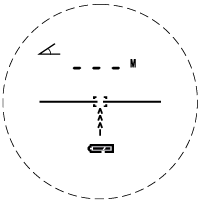
It will appear on the digital read out screen with a battery icon.
5. Mode selection
Your device has two modes of operation. In order to change the desired mode press the button to change between modes.
MODES: STANDARD, FOG
- In “Standard” mode.
In order to obtain the distance to object measurement, press the button.
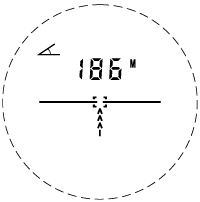
While pointing the LRF reticle at the object, you wish to know the distance to. You will see a digital readout of the distance and angle to your target.
- In “Fog” mode.
Fog Mode was designed to overcome such adverse environmental conditions as Fog.
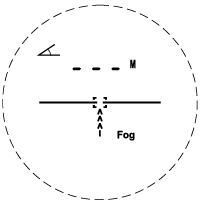
In order to obtain the distance to object measurement when there is Fog present in the environment, press the button. While pointing the LRF reticle at the object, you wish to know the distance to. You will see a digital readout of the distance and angle to your target.
6. Bluetooth
The ATN LaserBallistics has the ability to connect via Bluetooth to your ATN Smart HD Scope or to the ATN Ballistic Calculator App available in the Google Play Store or Apple Store. Please visit the Google Play Store or the Apple Store to download the ATN Ballistics Calculator App to use with your Day Scope. The App name is ATN Ballistics ![]()
7. Pairing your ATN Laser Ballistics to your ATN Smart HD Scope
- To do this you’ll need to power up the scope and allow it to reach its base reticle screen (home screen).
- After reaching the home screen you’ll next press the center (ENTER button) on the scopes keypad, which will bring up the carousel menu.
- Press the LEFT arrow button until you reach the feature icon area of the menu (you’ll notice the WiFi icon. WiFi will be written in text in the upper left of the display).
- Using the UP or DOWN arrow keys on the keypad you will scroll until the BLUETOOTH icon is displayed in the center of the screen.
- Press the ENTER button to un-slash the icon. This indicates the activation of BLUETOOTH.
- Use the UP or DOWN arrow keys to scroll to the BALLISTIC CALCULATOR icon and use the ENTER button to un-slash it. This will save time and steps later when the LBRF is connected to the scope and ready for use with the ballistic calculator program.
- Scroll to the SYSTEM SETTINGS icon in the carousel menu (indicated by a wrench in the center of the screen, and the text “SYSTEM SETTINGS” in the upper left of the display). Press the ENTER key to access the SYSTEM SETTINGS MENU.
- Use the LEFT arrow key to navigate to the SETTINGS section of the menu.
- Scroll down to the “WiFi and Bluetooth”. Select this option by hitting the enter key.
- A new menu will appear. Scroll down to “Rangefinder” and select this option using the ENTER key.
- A new menu will appear containing the options “Pair” and “Unpair”. Select the option to pair. This will activate Bluetooth searching , which searches for available Bluetooth devices. You’ll notice that the Bluetooth icon in the upper right of the scope’s display has a swirling circle around it indicating the search for the rangefinder.
- Next you’ll need the rangefinder in hand to press the power button on it. Press the power button on the rangefinder twice. This will sync the two devices. You’ll then see “Paired” to the right of “Rangefinder” in the menu. Now you can exit the menus and return to the home screen.
8. Use of LBRF with Smart HD Scope
The use of the LBRF with the Smart HD scope is easy.
- Press the power button on the LBRF to turn it on. A second press or press and hold of the power button will activate the laser within the device and begin ranging the target within the box in the display of the LBRF. In most conditions this calculation will be very rapid and the range to target will be instantly sent to the scope and displayed in the upper left of the display (display widgets must be set to “extended” in the scope’s menu to see the range in the display).
- If all ballistic data is correctly entered into the appropriate menus in the scope (see owners manual for scope for instructions), the BALLISTIC CALCULATOR feature will automatically and instantly take the new range distance data and move the reticle to the appropriate position for a direct hold on target solution. At this point you are ready to hold on target and fire a shot.
9. Use of LBRF with the ATN ballistics app
The LBRF can also be used in conjunction with the ATN BALLISTIC APP to provide you with the correct turret adjustments needed for a direct hold on target shooting solution with a traditional Day Scope.
- First the app will need to be added to your mobile device. The app can be found in the App Store or Google play store depending on the device type and operating system.
- Once the app is downloaded and installed on your device you can open the app.
- Upon opening the app you may get a Bluetooth permission request. This indicates that Bluetooth is turned off on your mobile device. Selecting yes will turn on Bluetooth on your device and begin the search for the LBRF.
- With the LBRF in hand, press the power button twice. This will make the LBRF available for connection to the mobile device and app.
- You’ll see on the mobile device that the LBRF is available for connection. Select it from the available devices in the menu.
- Upon selecting the LBRF from the menu and selecting continue, you will see a new menu on the mobile device containing available profiles. Select the appropriate option for your caliber weapon under “PROFILES”. If the correct caliber is not an option select a caliber you do not have (example: 50 bmg) and you can select the name and change it to your preferred Name/Profile.
- After selecting the profile option, you’ll then select the “CURRENT PROFILE” option to proceed to the next menu. This menu will contain various options for ballistic information and scope turret values. Once these are correctly inputted you can back out of that menu by using the back option on your device. This will bring you back to the previous screen/menu.
- Select continue.
- The next menu will give you options to input the correct environmental conditions. After inputting the correct values, select continue.
- At this point you will see a traditional scope depicted onscreen and numerical values within circle on each of the turrets. When you range a target these numerical values will change. The new values displayed are the turret corrections needed to achieve a hit with the reticle held directly on target.
- Refer to the LBRF previous section for the proper use of the rangefinder and the options available within the rangefinder.